Happy Friday Everyone!
Today's tutorial is an easy way to use Washi Tape and your Bombshell Stamps.
I like using washi tape as a background for my stamped image. I used the small icon stamps that are in the Bombshell Sets underneath the washi tape.
Supplies:
Bombshell Stamps Lucky Bride Set
Tsukineko Memento Ink in Jet Black
Washi Tape
Copic Markers
Star Bling / rhinestones
adhesive
pop dots
scissors
white cardstock card
First I inked up the stamp I wanted to use as the main image, stamped it and colored it with Copic Markers on white cardstock. I fussy cut out the image, inked the edges black and set it aside to dry.
I cut out a square using Sizzix dies and a die-cutting/embossing machine, but you can also just cut down a piece of cardstock to 3 1/2 by 3 1/2. I then stamped the small diamond and bow icon stamp onto the square.
Once it was dry, I took a piece of washi tape and placed it across the top of the square, securing the ends of the tape to the back.
I just continued placing the washi tape overlapping the pieces slightly until the entire square was covered.
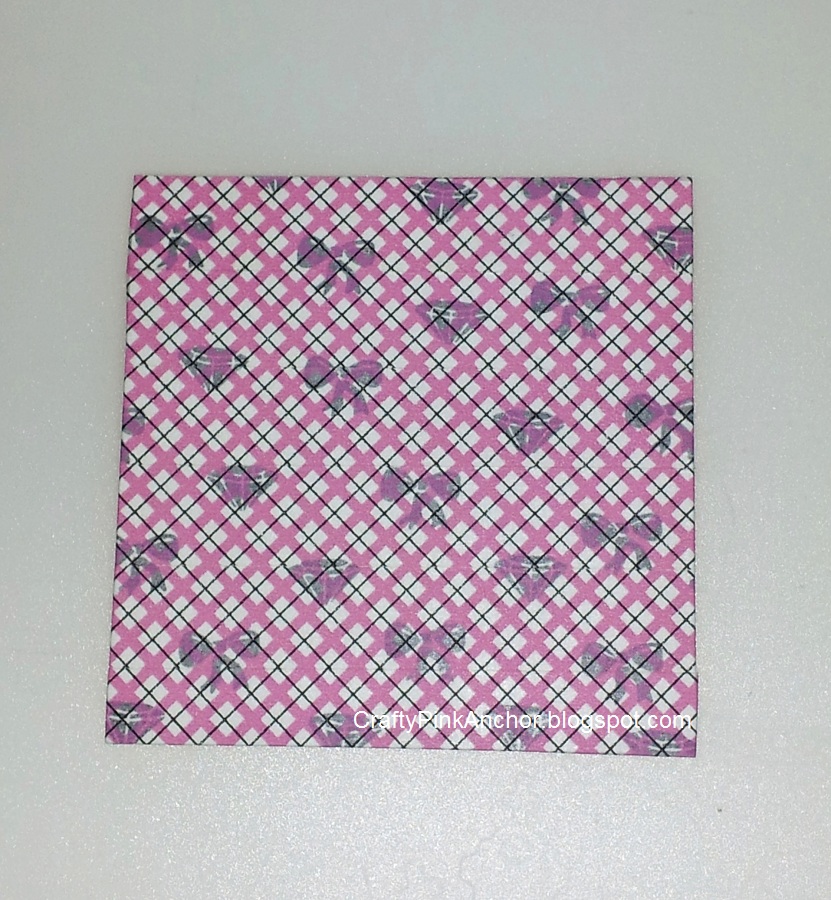
Next, I placed pop dots underneath this square piece and adhered it onto a white cardstock card.
I then attached the Bliss Horseshoe stamped image onto the top of the washi tape square using pop dots underneath for more dimension.
I then added some star bling in each corner.
So there you have it, a quick and easy way to use those icon stamps and a washi tape way to show off your awesome Bombshell artwork!
Hope you enjoyed this tutorial. If you have any questions please ask below!
Happy Craftin'!
- Kim
You can also see this tutorial on the Bombshell Stamps Blog! Check out the Bombshell Stamps Blog every Friday for a new tutorial by the DT members.
Friday, January 25, 2013
Thursday, January 24, 2013
Wonderful Wednesday on Thursday!
Hi Everyone!
The Bombshell Stamps Blog always features a tutorial on Fridays. Yesterday was Wonderful Wednesday, where some of the Bombshell Girls and Pin-Ups each showed off a project they made using another Bombshell's tutorial. It was a lot of fun! I tried out Stempelientje's Create Your Own Background Tutorial. My background did not come out nearly as nice as Stempelientje's did. She always has the coolest backgrounds!
Here's my card using her tutorial. I used the Man's Ruin Set for this card.
Please make sure to check out the Bombshell Blog here to see what the rest of the ladies created!
Thanks for looking!
And have a great almost Fri-day!
- Kim
The Bombshell Stamps Blog always features a tutorial on Fridays. Yesterday was Wonderful Wednesday, where some of the Bombshell Girls and Pin-Ups each showed off a project they made using another Bombshell's tutorial. It was a lot of fun! I tried out Stempelientje's Create Your Own Background Tutorial. My background did not come out nearly as nice as Stempelientje's did. She always has the coolest backgrounds!
Here's my card using her tutorial. I used the Man's Ruin Set for this card.
Please make sure to check out the Bombshell Blog here to see what the rest of the ladies created!
Thanks for looking!
And have a great almost Fri-day!
- Kim
Wednesday, January 23, 2013
Cassette Tape Valentine - Craftwell DT Project
Hi there!
Does anyone out there remember listening to cassette tapes back before the days of mp3's (and cd's before that)? I sure do! Today I'm sharing with you a cassette tape valentine I made. It's a gift box and a card at the same time! This is a great packaging idea for candy or a gift for any guy or music lover.
- eCraft by Craftwell
- eBosser by Craftwell
- SCAL3; SCAL3 basic shapes (rectangle)
- embossing folders: Gracious Argyle & Delicate Dots by Craftwell
- svg's: SVGCuts.com- 24 Valentines SVG Kit (cassette tape svg) & SVGCuts.com- Love Me Do SVG Kit (candy box)
- ink: colorbox by clearsnap
- clear acetate
- adhesive and pop dots
- Sakura Moonlight Gelly Roll pens; Sharpie marker
- cardstock: red, white, black
- washi tape
- velcro
How To:
I imported the candy box svg at the recommended size into SCAL3 and cut it out with my eCraft. I adhered acetate to the inside of the heart candy box and then assembled the box together.
Next using SCAL3 I selected a rectangle from the shapes library and sized it to 3.17"w x 4.5"h. I imported the bottom layer of the cassette tape svg, rotated it so the top was next to the height of the rectangle and then re-sized the cassette svg to 4.5"h. Then I merged the top of the cassette to the side of the rectangle. I cut out the welded shape with my eCraft and then scored it down the middle so I had a card. I re-sized the other layers of the cassette tape to fit the cassette card I just made and then cut them out with my eCraft.
Using my eBosser and Craftwell embossing folders, I embossed the red and white layers of the cassette tape. I inked the edges of the cardstock with colorbox ink and adhered all the layers together and then onto the card. Once everything was glued together (bottom piece has pop dots underneath for dimension), I adhered the rectangle part of the card onto the back of the candy box (the side without the heart.) I added some washi tape onto the sides of the box. On the inside of the card I attached a small piece of velcro and also wrote Happy Valentine's Day with Sakura Gelly Roll Pens.
If you have any questions please ask below. Thanks for letting me share this project with all of you!
Don't forget to check out the rest of the DT's projects made with the eCraft and eBosser at the Craftwell Blog!
Have a Happy Wednesday!
- Kim
Wednesday, January 16, 2013
Cherry Blossom Necklace - Craftwell DT
Hi All!
I recently purchased some dies and embossing folders that are made to etch and emboss metal charms. I am super excited to be able to use them in my eBosser! I used to make jewelry a lot, but a few years ago I stopped because I didn't have much time to anymore. I have a feeling I will be making a lot more time for it in the future now.
Supplies:
-eBosser by Craftwell
-Cherry Blossom Garden Vintaj DecoEmboss folder by Sizzix
- jewelry pliers - flat nose/needle nose; wire cutters to cut chain
- chain in antique brass
- 34mm Natural Brass Circle Charm Blank By Vintaj
- Two-Hole Metal Hole Punch
- Vintaj Metal Reliefing Block
- 10 jump rings
- clasp
Using a metal hole punch, I punched three holes across from the hole that was already on the metal charm blank.
Next, I embossed the metal blanks with my eBosser using the combination (starting from the bottom) D, C, embossing folder with charm blank inside it, A on top.
Then I buffed the metal charms with the reliefing block.
I also buffed the debossed (back) side of the charms. This side looks really cool too, so it can also be used as the front if you'd like!
I then attached jump rings and chain to the bottom of the charm. (6 inches, 6 1/2 inches, and 7 inches)
Then I attached 6 1/2 inches of chain and jump rings to the top of each charm and added a clasp.
I recently purchased some dies and embossing folders that are made to etch and emboss metal charms. I am super excited to be able to use them in my eBosser! I used to make jewelry a lot, but a few years ago I stopped because I didn't have much time to anymore. I have a feeling I will be making a lot more time for it in the future now.
Supplies:
-eBosser by Craftwell
-Cherry Blossom Garden Vintaj DecoEmboss folder by Sizzix
- jewelry pliers - flat nose/needle nose; wire cutters to cut chain
- chain in antique brass
- 34mm Natural Brass Circle Charm Blank By Vintaj
- Two-Hole Metal Hole Punch
- Vintaj Metal Reliefing Block
- 10 jump rings
- clasp
Using a metal hole punch, I punched three holes across from the hole that was already on the metal charm blank.
Next, I embossed the metal blanks with my eBosser using the combination (starting from the bottom) D, C, embossing folder with charm blank inside it, A on top.
Then I buffed the metal charms with the reliefing block.
I also buffed the debossed (back) side of the charms. This side looks really cool too, so it can also be used as the front if you'd like!
I then attached jump rings and chain to the bottom of the charm. (6 inches, 6 1/2 inches, and 7 inches)
Then I attached 6 1/2 inches of chain and jump rings to the top of each charm and added a clasp.
Hope you enjoyed this tutorial! If you have any questions please leave a comment below.
- Kim
Wednesday, January 9, 2013
Ready for Spring here! - Craftwell DT Project
Hi Everyone!
Now that the holiday season is over, I find myself wanting to craft spring decor. Is it wrong to be thinking about spring time already? I altered a frame with some brightly colored cardstock flowers and an etched Ella Umbrella Silhouette, which is one of my favorite silhouette images.
Supplies:
-eCraft
-eBosser
-eCraft Shop Pro
-SVG - Umbrella Ella Silhouette by Craftwell
-Tim Holtz Tattered Florals Die
-Divine Damask Embossing Folder by Craftwell
-Copic Markers
-Pop Dots
-Contact Paper-Armour Etch Glass Etching Cream
-Vinyl Gloves/Sponge Brush/Glasses
-Frame (the inside of the frame I used was 7 1/2 x 10 h)
-gesso and white acrylic paint (Martha Stewart Craft Paint)
-Rhinestones (Queen and Co)
-Adhesive (Scotch ATG)
- cardstock (purple, pink, yellow)
A while ago, I found a frame on clearance at my local craft store for $2. The wood was a little banged up, and the glass had a few little scratches on it, but I bought it anyway figuring I would totally do something with it. Well, it sat around my craft room for a loooooooong while (probably a year or two). So this year, one of my New Year's Resolutions is to use the items I already have at home.
I removed the backing and glass from the frame and applied a few coats of gesso to the frame and then let it dry. Then I applied a few coats of white acrylic paint and let it dry. I cut out the Ella Umbrella Silhouette at 6 inches in height with contact paper with my eCraft and removed the silhouette image. I used the background and applied it to the glass so that the cut out of Ella was in the middle. I then used Etching Cream on the inside of the silhouette to create a frosted image of Ella. (For a more detailed instruction of how I use glass etching cream see my snowflake mug project here. When using the etching cream, please follow the manufacturer's instructions and warnings.) After the glass has been rinsed off, cleaned and dried, and the frame is dry, I put the glass back into the frame. Then I cut a piece of purple cardstock to fit inside and closed up the frame with the backing.
I cut out different sized flowers in pink, purple and yellow cardstock with my eBosser and Tim Holtz Tattered Florals Die. Then I embossed the die cut flowers with the Divine Damask Embossing Folder. Using Copic markers I inked the edges of the flowers. To give the flowers some dimension and a different look, I bent and curled the edges on some while using both the embossed and the debossed sides. I adhered the flowers together and placed them onto the wood frame with Scotch ATG adhesive and pop dots and added rhinestones in the middle of the flowers. On the glass, I adhered three small flowers at different heights and put rhinestones in the middle of them. I also adhered rhinestones on the glass above the falling flowers and also on the bottom right.
What are your crafty New Year's Resolutions? Besides using the craft items I already have at home, my other resolution is to keep my craft supplies organized this year! This way I don't have to re-organize them every few weeks.
Have a great day!
- Kim
Tuesday, January 8, 2013
January Sketch Challenge
Hey Everyone!
Every month at Bombshell Stamps there is a sketch challenge. You can make a card or project based on the sketch using Bombshell Stamps Sets and link it up on their blog post for a chance to win a stamp set! That's pretty awesome!
Here's this month's sketch as seen in the Bombshell Forum. If you have never been, definitely check it out! If you sign up there are some free digis in the forum! But, shhhh I didn't tell you that ;)
Below is my card based on the sketch. I went with one of my newest sets, Man's Ruin.
I colored the image in with Copic markers and embossed the neon green and pink cardstock with embossing folders and the eBosser. The white cardstock I stamped with the fun little record icon stamp that is in this set.
I also placed pop dots underneath the image and then the cluster of rectangles to give the card some dimension.
Thanks for looking! Make sure to link up your take on the sketch at the Bombshell Stamps Blog. If you have any questions please ask below in the comment area.
Have a great day!
- Kim
Supplies
Bombshell Stamps - Man's Ruin
Memento Ink
Copic Markers
eBosser by Craftwell
Embossing Folders: Delicate Dots (LTR) by Craftwell; Stars by ProvoCraft Cuttlebug
Brads - unknown
Cardstock - Bazzill (Black); neon - unknown
Every month at Bombshell Stamps there is a sketch challenge. You can make a card or project based on the sketch using Bombshell Stamps Sets and link it up on their blog post for a chance to win a stamp set! That's pretty awesome!
Here's this month's sketch as seen in the Bombshell Forum. If you have never been, definitely check it out! If you sign up there are some free digis in the forum! But, shhhh I didn't tell you that ;)
Below is my card based on the sketch. I went with one of my newest sets, Man's Ruin.
I colored the image in with Copic markers and embossed the neon green and pink cardstock with embossing folders and the eBosser. The white cardstock I stamped with the fun little record icon stamp that is in this set.
I also placed pop dots underneath the image and then the cluster of rectangles to give the card some dimension.
Thanks for looking! Make sure to link up your take on the sketch at the Bombshell Stamps Blog. If you have any questions please ask below in the comment area.
Have a great day!
- Kim
Supplies
Bombshell Stamps - Man's Ruin
Memento Ink
Copic Markers
eBosser by Craftwell
Embossing Folders: Delicate Dots (LTR) by Craftwell; Stars by ProvoCraft Cuttlebug
Brads - unknown
Cardstock - Bazzill (Black); neon - unknown
Tuesday, January 1, 2013
Happy 2013!!!!
Happy New Year's Everyone!!!!
Besides today being the first day of 2013, Bombshell Stamps is also having a blog hop! Woohoo! Fun times!
Ok, so you should have hopped on over here from Cassie's Blog. If not, please do start at the beginning at the Bombshell Blog so you don't miss any awesome projects! And please, pardon our hop's late appearance, since it was postponed from last month. But honestly, I can't think of a better way to help ring in the New Year than with a Bombshell Blog Hop!!! =)
This month, our blog hop captain Alison has picked the theme of "make it a gift!" And absolutely no cards, this month. Easy for me, I do love making cards, but I do love crafting other things too. So I decided to go DIGI! Yep. I made myself use a digi stamp and color it in with the computer.... No ink, (um, well no stamp ink) and no copics, no colored pencils.
I made a gift for a baby --- a baby onesie!
I opened up the Wild Horses Digital Stamp in Paint and then re-sized the horse and flowers to fit on the onesie. I then used the paint bucket to fill (color) the image in different colors. I printed it out using my printer onto some t-shirt transfer paper. Once it was dry, I cut out the images with scissors. (Note: I only had dark t-shirt transfer paper so there is white around the image, since I didn't trim to the outline.) Then I ironed the horse and flowers onto the onesie using the manufacturer's directions.
Thanks for hopping along with us! I hope you are inspired by the Bombshell's projects! Please hop on over to Emily's Blog to see what gift she has created.
I hope you all have a happy, healthy and safe New Year!
- Kim
Blog Hop List:
Bombshell Blog: http://bombshellstamps.blogspot.com/
Alison: http://alisonsrandomthoughts.blogspot.com
Cassie: http://casbacreations.blogspot.com/
Kim: http://www.craftypinkanchor.blogspot.com --- You are here! Thanks for visiting!
Emily: http://www.bombshellemsartisticexpressions.blogspot.com --This is your next stop!
Jodi: http://www.elamdesign33.blogspot.com/
Sparkly Mary: http://sparkly-train.blogspot.com/
Glittery Katie: http://ferrishyn-frontier.blogspot.com
Monika: http://paperchrome.blogspot.com/
Alaine: http://missalaineousmosaics.blogspot.com/
Kathi: http://kathstales.blogspot.com
Besides today being the first day of 2013, Bombshell Stamps is also having a blog hop! Woohoo! Fun times!
Ok, so you should have hopped on over here from Cassie's Blog. If not, please do start at the beginning at the Bombshell Blog so you don't miss any awesome projects! And please, pardon our hop's late appearance, since it was postponed from last month. But honestly, I can't think of a better way to help ring in the New Year than with a Bombshell Blog Hop!!! =)
This month, our blog hop captain Alison has picked the theme of "make it a gift!" And absolutely no cards, this month. Easy for me, I do love making cards, but I do love crafting other things too. So I decided to go DIGI! Yep. I made myself use a digi stamp and color it in with the computer.... No ink, (um, well no stamp ink) and no copics, no colored pencils.
I made a gift for a baby --- a baby onesie!
I opened up the Wild Horses Digital Stamp in Paint and then re-sized the horse and flowers to fit on the onesie. I then used the paint bucket to fill (color) the image in different colors. I printed it out using my printer onto some t-shirt transfer paper. Once it was dry, I cut out the images with scissors. (Note: I only had dark t-shirt transfer paper so there is white around the image, since I didn't trim to the outline.) Then I ironed the horse and flowers onto the onesie using the manufacturer's directions.
Thanks for hopping along with us! I hope you are inspired by the Bombshell's projects! Please hop on over to Emily's Blog to see what gift she has created.
I hope you all have a happy, healthy and safe New Year!
- Kim
Blog Hop List:
Bombshell Blog: http://bombshellstamps.blogspot.com/
Alison: http://alisonsrandomthoughts.blogspot.com
Cassie: http://casbacreations.blogspot.com/
Kim: http://www.craftypinkanchor.blogspot.com --- You are here! Thanks for visiting!
Emily: http://www.bombshellemsartisticexpressions.blogspot.com --This is your next stop!
Jodi: http://www.elamdesign33.blogspot.com/
Sparkly Mary: http://sparkly-train.blogspot.com/
Glittery Katie: http://ferrishyn-frontier.blogspot.com
Monika: http://paperchrome.blogspot.com/
Alaine: http://missalaineousmosaics.blogspot.com/
Kathi: http://kathstales.blogspot.com
Subscribe to:
Posts (Atom)


